20 minutes
In the diagram below, click in the areas bounded by red lines to familiarise yourself with the user interface.

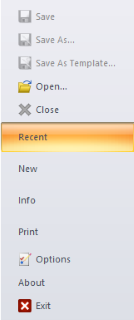
Application File Menu
-
Click
 to access the File menu.
This is where you can:
- create, open or save a project.
- save a project as a project template.
- print the projects model view.
- view and manage your software licence.
- set options, including default folders and user interface settings.
- customise the user interface.
- Click Open, navigate to Documents\Tutorial Data then click the file User Interface.neo and click Open.
-
Click
 to open to the File menu.
In the Recent Projects list, click
  aligned with the User Interface.neo project to pin it permanently in the recent projects list.
-
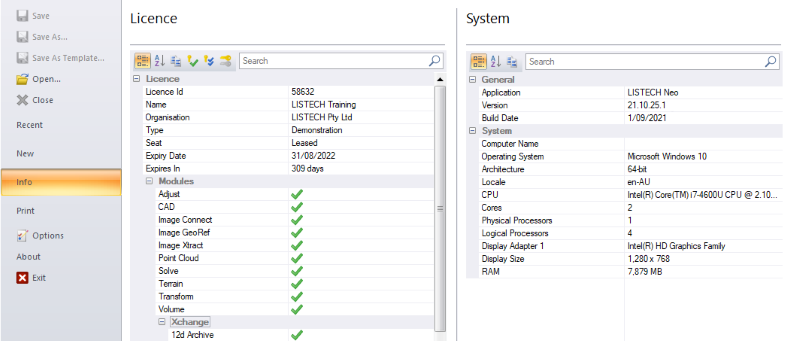
In the File menu, select Info.
This is where you can:
- activate or manage your licences.
- view the licence details.
- view information about your computer.

-
In the File menu, select Options.
This is where you can:
- set application wide user interface options.
- specify the default folders where files are stored.
- customise the ribbon.
- customise the Quick Access toolbar.
- customise the context menu.

- Click Cancel.
Quick Access Toolbar
-
View the Quick Access toolbar.

This is where you can add frequently used commands.
Ribbon
-
View the ribbon. It organises commonly used commands. You can customise the ribbon to suit your work flow. The ribbon is comprised of:
- Tabs - By default there are six tabs; Home, Manage, Measurements, CAD, Alignment and Report.
- Groups - A cluster of similar commands.
- Commands - Click the command to perform an action. An arrow beside or below a command indicates there are additional, more specific, commands available. Commands may launch a window.
Some commands are only available when: - a specific view is active.
- you have a subscription to the relevant module.
-
On the ribbon, click the Home tab.

The following groups display:
Group This is where you can... Edit Edit objects and vertices in the model view. Select Select objects in the model view.
You can configure:- the type of objects to select.
- how the objects are selected.
- to select objects linked to selected objects.
View Change how the data is displayed in the model view. Includes the ability to change between Plan and 3D view. Layer Edit, copy, isolate, adopt or define the active layer. Created objects are placed on the active layer and by default will use the layers display settings. Data Import and export data. You can add or remove, import and export formats from the drop down menu. Tools Access specific tools including: - Attributes - Display information about an object
- Create - Add points, lines, polygons, shapes, texts, images, or terrain models.
- Examine - View relationships between objects.
- Find - Find an object with specific attributes.
- Layers - Manage the layers.
- Modify - Edit the object.
- Options - Set options for project specific display, naming , precision, reporting and units.
- On the ribbon Home tab, in the Tools group, select the Layers checkbox to display the Layers tool window. Tool windows can be docked and rearranged.
-
On the ribbon, click the Manage tab.

The following groups display:
Group This is where you can... Configuration Manage settings and objects specific to the project including: - Lookup tables
- Images
- Image and feature services
- Point clouds
- Reference files
- Control codes
- Coordinate systems
- Block definitions
- Plan symbols, line styles and fill
- Table styles
- Text Styles
- Colours
- Import configuration settings
Maintenance Compact and update the software. Window Display additional work area windows. -
On the ribbon, click the Measurements tab.

The following groups display:
Group This is where you can... View Display a measurement view that contains all total station, GNSS and level measurements in the project. Edit Modify measurements in the measurement view. Process Reduce and adjust measurement data and process codes. -
On the ribbon, click the CAD tab.

Use these commands to prepare drawings in paper space. The following groups display:
Group This is where you can... Edit Delete objects, or copy and paste objects from one drawing to another. Select Select objects in the active drawing view. You can configure: - the type of objects to select.
- how the objects are selected.
View Change how the data is displayed in the drawing or in the drawings viewport. View commands apply to the selected viewport when the viewport is being edited, otherwise the commands apply to the drawing. Drawing Create drawings or drawing templates, configure the drawing properties or plot a drawing. Viewport Create a viewport or edit the model view objects displayed in the viewport. In Edit mode you can: - use the view tools to zoom, pan and rotate the viewports contents.
- use the Layers tool to edit the visibility of layers or the layers display options for the viewport. These settings are unique for each viewport.
- use the Options tool to edit the display options for the viewport. These settings are unique for each viewport.
Draw Draw objects in the drawing and display a drawing grid. Modify Modify objects in a drawing. You can: - Move the location of an object or viewports vertices.
- Explode a block.
- Join Objects.
- Break Objects.
Layer Edit, copy, isolate, adopt or define the active layer. Created objects are placed on the active layer and use the active layers display settings. -
On the ribbon, click the Alignment tab.

The following groups display:
Group This is where you can... Properties Edit alignment geometry and properties: - Apply chainage equations to alignments.
- Insert curves into alignments.
Design Insert parameters and standards to be used when generating curves for alignments. -
On the ribbon, click the Report tab.

The following groups display:
Group This is where you can... Create Create a report on the data in the project. View Save and manage reports.
View Tabs
-
The work area view tabs
 available depend on current user interface settings and the action performed.
The following view tabs may display:
Tab Description Model A plan or 3D view of the project data Start Page Latest news, Licence status and quick access to some file commands. Measurements Total station, GNSS and level measurements. Drawing Visible drawings in paper space that may contain a viewport to data in the model view. Reports The view tab is given the name of the report. On the ribbon click Measurements /
New Measurements View to display the Measurements view.
The active tab's name is bold. This is the view that commands will apply to. The commands available in the ribbon depend on the active view tab and the items selected. -
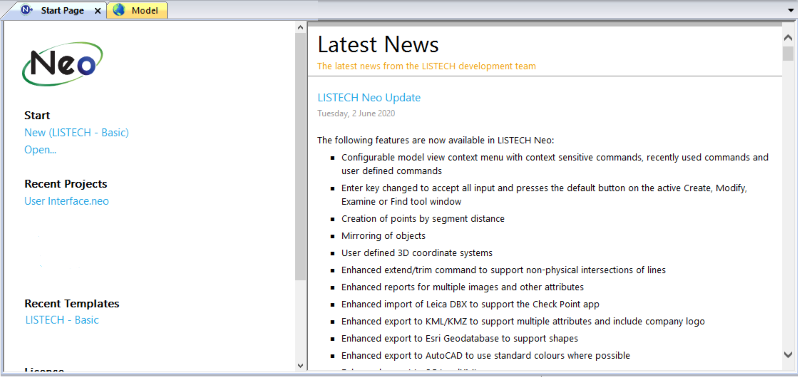
Click the Start Page view tab.
This is where you can:
- Create a new project using one of the most recently used templates.
- Open recently used projects.
- View the latest application news and licence details.

Click the Model tab.
Status Bar
- Right-click in the status bar to view the information that can be displayed. The active ribbon tab will also determine what information is displayed. When applicable, prompts will appear in the left hand side of the status bar to show information related to the current command.
Help
Now you should have a good understanding of where to find things in the applications user interface.
If you have any questions, please contact: support@listech.com.
 to access help. This is where you can search for topics using the contents, index or keyword searches.