Customise the application to suit your requirements.
In this tutorial you will learn how to:15 minutes
Change the Appearance
You will select your preferred appearance style.
-
If the Start Page view tab is not displayed:
-
Click
 to access the File menu.
- Click Options and select the Show Start Page checkbox, then click OK. The next time you open the application the start page will display.
-
Click
-
In the top right corner of the application window, click Style.

-
Click Light to activate the light theme.

- Decide the style you prefer. Revert back to the Dark style if that is your preference.
Organise the Tool Windows
You will display tool windows and explore different docking methods.
- On the ribbon Home tab, in the Tools group, click Find. The Find tool window displays.
- On the ribbon Home tab, in the Tools group, click Attributes. The Attributes tool window displays.
- On the ribbon Home tab, in the Tools group, click Options. The Options tool window displays.
-
On the ribbon Home tab, in the Tools group, click Layers. The Layers tool window displays. The tool windows are all visible and docked to the right of the work area.
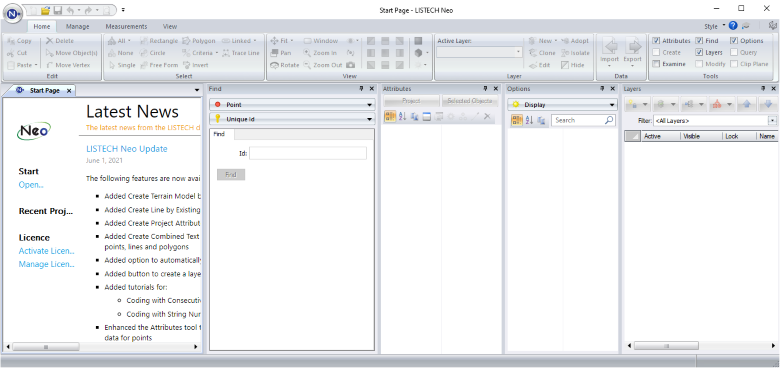
If you have previously organised your tool windows, the windows will display using your specified layout. -
You can dock the windows in a new location. Click and hold in the title bar of the Options tool window and drag the window to the centre of the Layer tool window. The guide diamond appears.

Hover the mouse pointer over the central box and release. The Options tool window is now docked as a tab window. You can toggle between the Layer tool and the Options tool using the tabs at the bottom.
- Click and hold in the title bar of the Attributes tool window and drag the window to the centre of the Options tool window. The guide diamond appears. Hover the mouse pointer over the down arrow and release. The Attributes window is not docked with other tool windows (there are not any tabs at the bottom of the window) so it will always be visible.
-
Right click in the title bar of the Find tool window. Select Auto Hide. The Find tool window is hidden along the right edge of the application window.
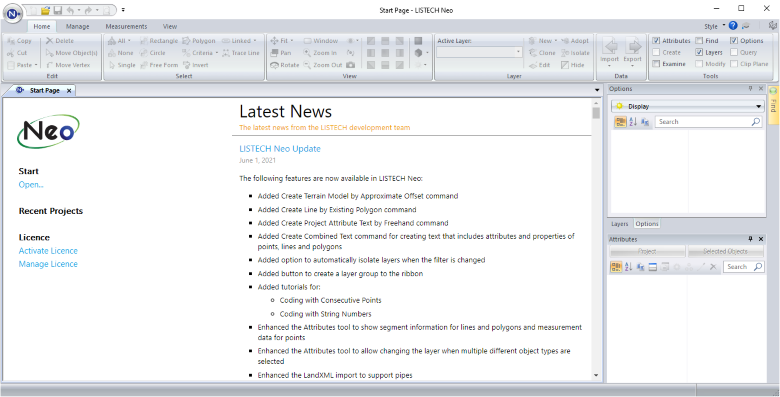
- To display the Find tool window, hover the mouse pointer over the Find tab. While the Find tool window is displayed, click
 in the title bar to return the Find window to the previous docked location.
 - Click
 in the Find tool window title bar to close the window.
Customise the Ribbon
You will add a command to a new group in the ribbon to provide easy access to a commonly used command.
- Click
 to access the File menu.
 - Click Options, the General page is displayed.
-
Click Customise Ribbon to change pages.
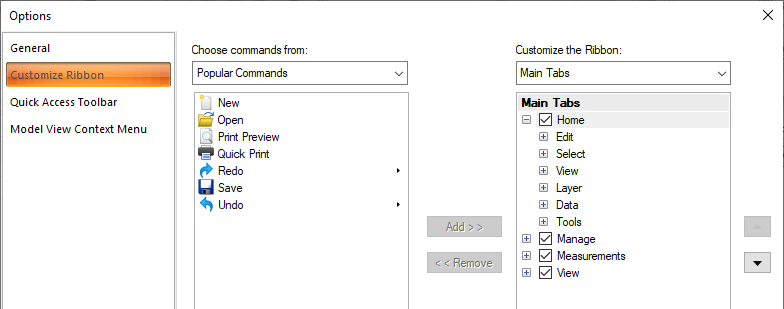
In the Main Tabs list, the Home tab is highlighted. This is the tab the new group will be added to.
- Click New Group.
-
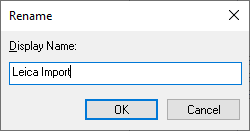
Click Rename, then in the Display Name box, type Leica Import. Click OK.
- In the Choose commands from list select Create.
-
Select Create Point by Bearing and Distance.
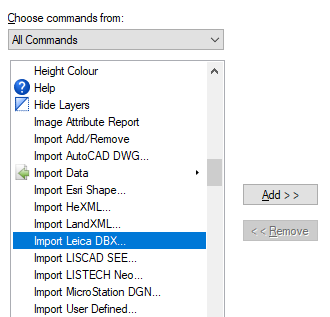
- Click Add > >.
-
Click OK to add the Create group to the ribbon.

Customise the Quick Access Tools
You will discover two ways to quickly access commands. First, you will add a keyboard shortcut to a command.
- Click
 to access the File menu.
 - Click Options, the General page is displayed.
- Click Quick Access Toolbar to change pages.
- Click Customise.
- In the Categories list, select All Commands.
-
In the Commands list box, select Create Point by Bearing and Distance.
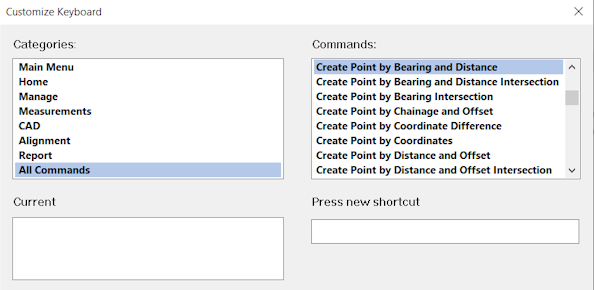
- Click in the Press new shortcut key box.
- Press and hold the Ctrl and Shift keys, then press the B key. Release the Ctrl and Shift keys.
-
Click Assign, then click Close.
Now, you will add the command to the Quick Access Toolbar.
- In the Choose commands from list click Commands not in the ribbon.
-
Select Create Point by Bearing and Distance from the list.
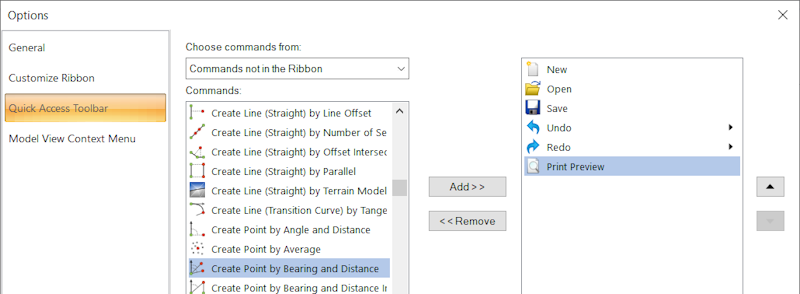
- Click Add > >.
-
Click OK to add the 'Create Points by Bearing and Distance' tool to the Quick Access Toolbar

| You can also add the command to the model view context menu. |
Select the Default Folders
When a file is opened, saved, imported or exported the default folder will depend on your settings. You will see how to change settings that affect the default folder.
- Click
 to access the File menu.
 - Click Options and the General page is displayed.
-
Click in the Default Folder box, then click
 and select Last Used (File Type).
With this Default Folder setting, the first time you select Import | AutoCAD DWG the application will default to the Default Project folder. Then if you navigate to folder 'A' and import the AutoCAD DWG file, the next time you import an AutoCAD DWG file, the application will default to folder 'A'. To view other default folder settings, see General Options.
- Click in the Default Project box, then click
 .
. - Navigate to the folder where you want to store your projects. If you prefer, you can select a shared folder on a file server.
- Click OK.
- The settings in this tutorial are application wide, they are not project specific.
- To return the ribbon to its default state, see Customise the Ribbon.
- To return the Quick Access Toolbar to its default state, see Quick Access Toolbar.
Now you should have a good understanding of how to configure the application.
If you have any questions please contact: support@listech.com.
