To complete this tutorial you will require the Computations module.
Note: This tutorial can only be partially completed using LISCAD Lite.
Aim
The aim of this tutorial is to show you how to configure the units used in SEE to suit your particular needs. You will learn how to:
- Configure the System units that are used when all new projects are created.
- Configure the Default data folder used when you create or open a project.
- Change the units in a particular project without affecting the System units for new projects.
- Examine co-ordinates in static and dynamic mode.
Before you begin
Select this button to install the required data files.
If you currently have a file open, select Task/Utilities followed by File/Close to close it down.
Now proceed with the steps below.
- Set the Default Unit Values
Run SEE and select Configure/Units to display the Units Configuration dialog.
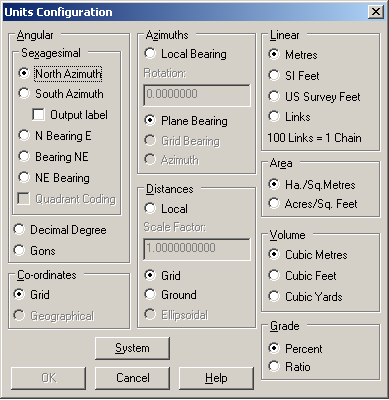
For the purpose of the SEE tutorials, ensure that the settings are as shown above. Then select the System button to display the following message.
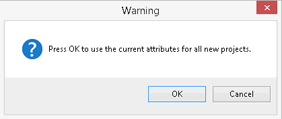
Select OK and these attributes will be used for all new projects. Then close the Units Configuration dialog.
(When you have completed all the SEE tutorials, and are using the system on your own projects, you should repeat the above steps choosing the units that suit your particular needs.)
- Open the Example Data File and Review the Units for this
Project
Select File/Open. Navigate to the "Tutorial" folder, which will have been created off your current Data folder and open "Configure Units.see"
Select Configure/Units and make selections as shown below. Then press OK.
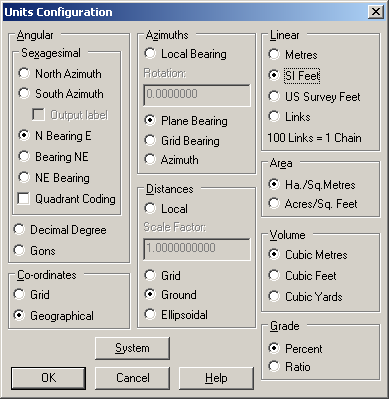
Note the changes in the bearing and distance shown.
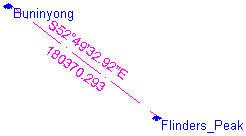
The bearing is now in N Bearing E notation and an Azimuth value.
The distance is now in SI Feet on the Ground value.
- Examine the Points in the Data Set
Select Task/Computations.
Select Examine/Co-ordinates, and with the Static radio button selected, snap to the Buninyong point.
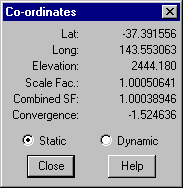
Note the co-ordinates are now Latitude and Longitude
Also select the Dynamic radio button, and move the cursor about the window. Note the dynamic updating of the co-ordinates. Then close the dialog.
Conclusion
You have now completed this tutorial and should have a good understanding of how to configure units and also change the configuration of units for a particular project at any time.
You have also learnt how to:
- Set a default data folder.
- Examine co-ordinates in static and dynamic mode.
Note: When you open a project, it retains the same unit settings that it was closed with. The system settings are used only for new projects.