- Copy Selected Objects Into the Clipboard
Select File/Open and in the Data folder select to open the file "North.lcd".
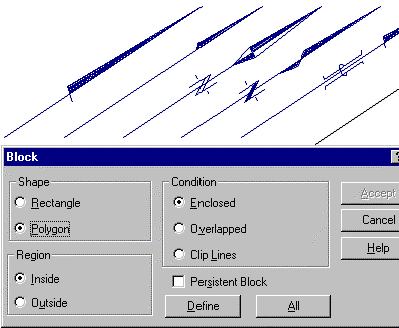
Window into the area shown and select Block/Define. Make the selections as shown and press the Define button.

Draw a polygon block around your desired north point using the Accept mouse button.
Select Settings/Search Filter.
In the dialog, select All and then OK. This will ensure that all object types making up the north point can be copied.
Select Edit/Copy to copy the north point to the clipboard.
- Paste the Copied Objects Into Another File
Open "Cadtut.lcd" again by selecting it from the File menu.
Select Edit/Paste and accept with the mouse at the required location for the North Point. Ensure you place it well clear of other objects.
Note:
Here we have copied data from one file to another. This is an easy technique to enable commonly used plan frames, north points, logos, disclaimers etc. to be stored in CAD files and used when needed. Simply create the drawing you need once, and use it over and over again.