Ensure that you have the appropriate Windows printer/plotter driver installed for your printer/plotter. Since you will be plotting an A2 size plan, it should be any printer/plotter that can plot A2 or larger and is supported by Windows.
- Set-up the Plot Sheet
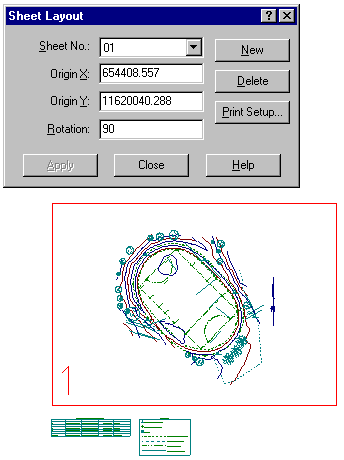
Select Settings/Sheet Layout to display the Sheet Layout dialog, and then click the Print Setup button to display the Print Setup dialog.
Select the printer/plotter you want to use, and make the appropriate settings for your particular driver.
Select Paper Size A2 and Orientation Landscape. (Some drivers may not allow the selection of Landscape, but this can be overcome by rotating the sheet 90°).
Select OK to close the Print Setup dialog.
- Create and Place the Plot Sheet
Select the New in the Sheet Layout dialog to create a new sheet, shown with its number (1) in the lower left corner (shown below).
If your driver did not allow the selection of Landscape, enter 90° in the Rotation field and press Apply to change the plot sheet to Landscape.
Move the cursor to the sheet boundary and drag the sheet such that it is centrally positioned around the main drawing. (Note that the cursor will change to allow rotation of the sheet when near the upper left, upper right, or lower right sheet corners.) Use the viewing tools as needed.
Close the Sheet Layout dialog.
Use View/Sheets to see the sheet after closing this dialog.

Note:
The sheet defines the extents of the area to be plotted.